
How to Book Fold - Simple Tutorial
Learn how to fold a book into a word or picture with this simple tutorial. The first time I saw a book fold I remember thinking how complicated it looked and that I wished I could learn how to make one myself. It turns out it is actually a surprisingly simple craft! It will take a few hours to fold all of the pages, however it isn't anywhere near as complicated as it looks!
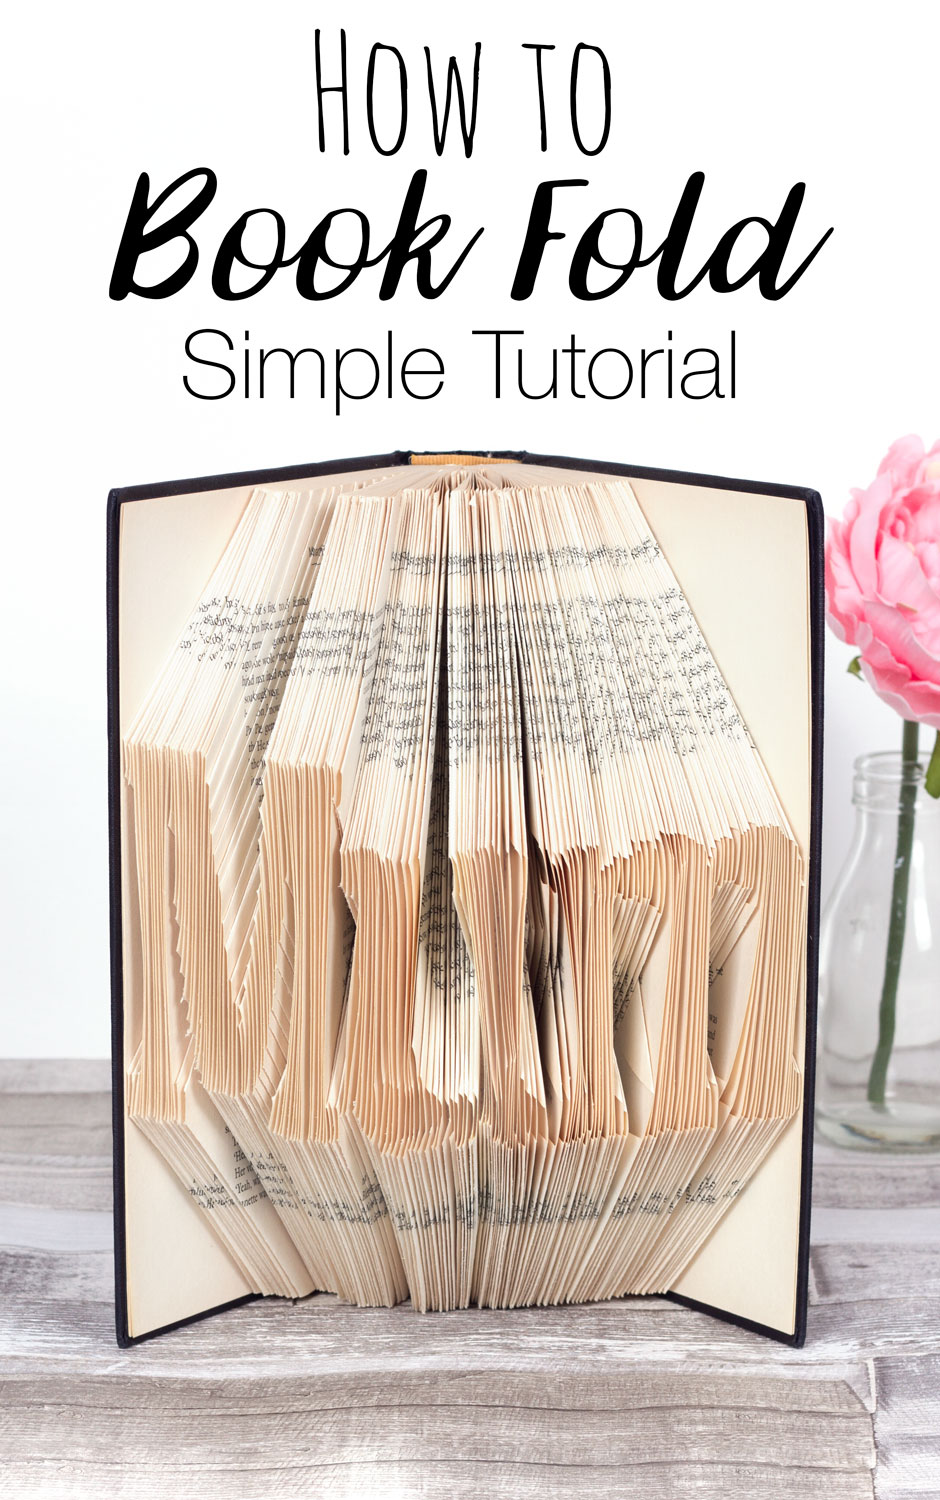
This tutorial is to fold the word "mum" into the book, however you can use this same technique to fold any word or picture that you want.
To make this book folding you will need:
- A book - preferably a hard-backed book and 400 pages or more
- Ruler or something hard and flat that you can use to press down the folds
- Book folding pattern
- Or purchase a custom pattern here
- Printer (to print out the template)
Step 1:
Download the pattern here and print it out at full size - this will be on three separate sheets of paper. This pattern is for the word "mum" and requires at least 402 pages in the book (201 folds).
If you want a custom pattern you can purchase one here and I will create it for you!
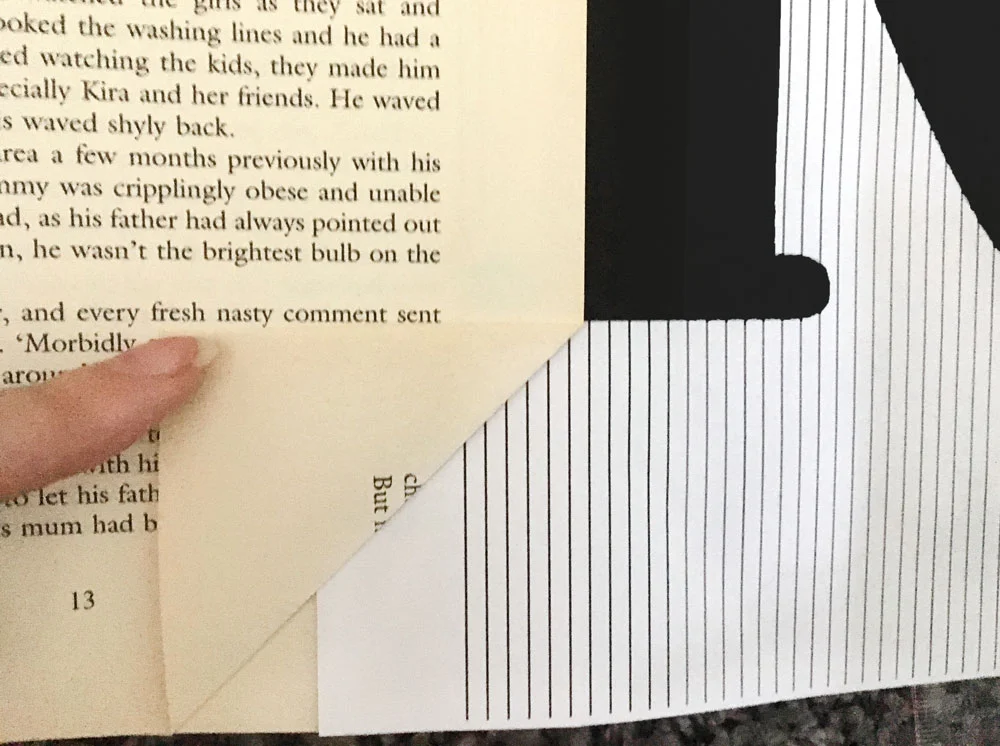
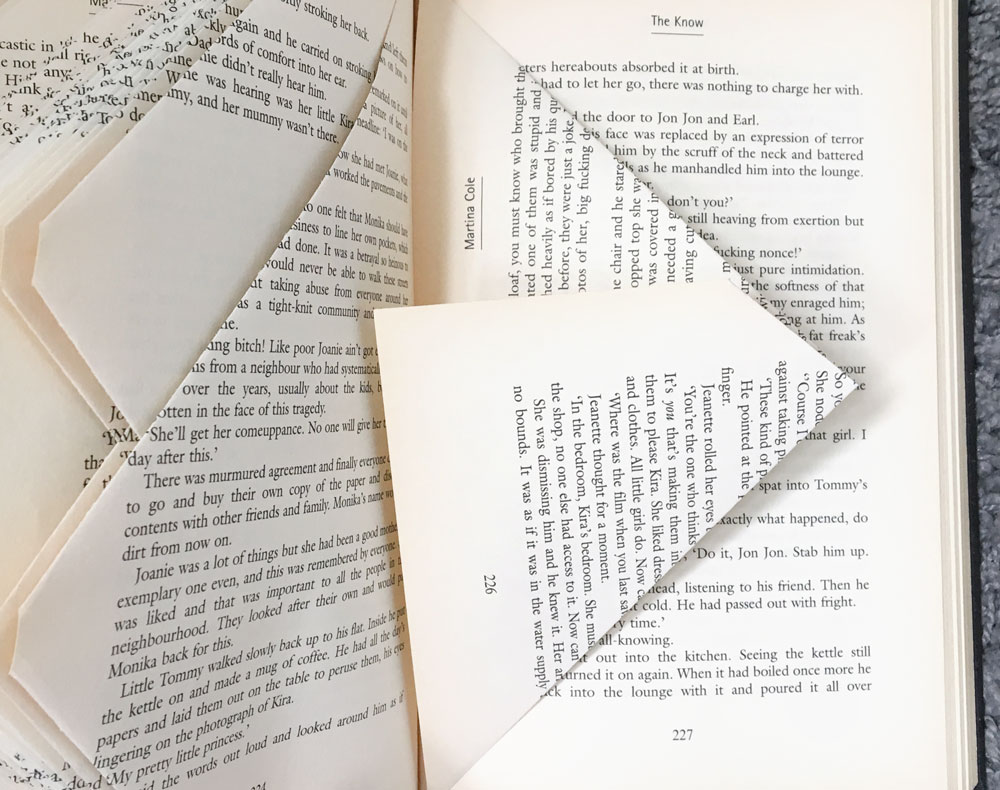
Place the template in the book behind the first page that you want to fold. Make sure the bottom of the sheet of paper is in line with the bottom of the book (the word should be in the centre of the book, if it isn't then trim the bottom of the paper until it is - and remember to trim the other pieces of paper the same). Place the pattern so that the first vertical line is in line with the edge of the page. Then fold the bottom corner up at a 45 degree angle until it is in line with the edge of the black text on that line, as shown in the image above (please note: this image is not of the first fold, it is of the 7th).
Step 2:
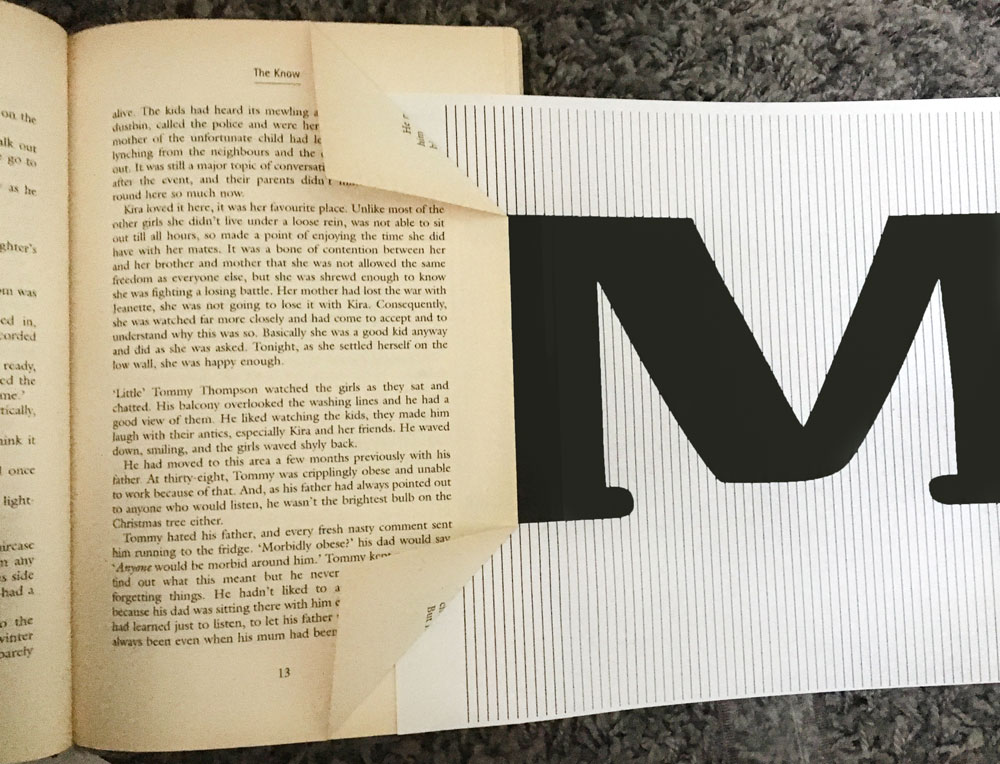
Fold the top corner of the page down at a 45 degree angle until it is in line with the edge of the black lettering on that line (shown in the photo above). Then use your ruler to flatten the folds to ensure they stay folded.
If you reach part of the pattern that has two or more areas of black text (this will happen with letters such as "O" "P" "Q" "B" etc), then just fold to the top part of the black lettering on one page, and on the next page you will fold to the next part of the letter. Continue to alternate the pages.
Step 3:
Turn the page that you just folded to the other side of your book, then place the folding pattern behind the next page. Move it down so it is now on the second vertical line and repeat step 2. Continue this technique until the letter M is complete.
Make sure you make a mark on the pattern each time you make a fold so that you know which line you are up to - it is very easy to lose track! I just used a pen and marked the line every time I finished a page.
Step 4:
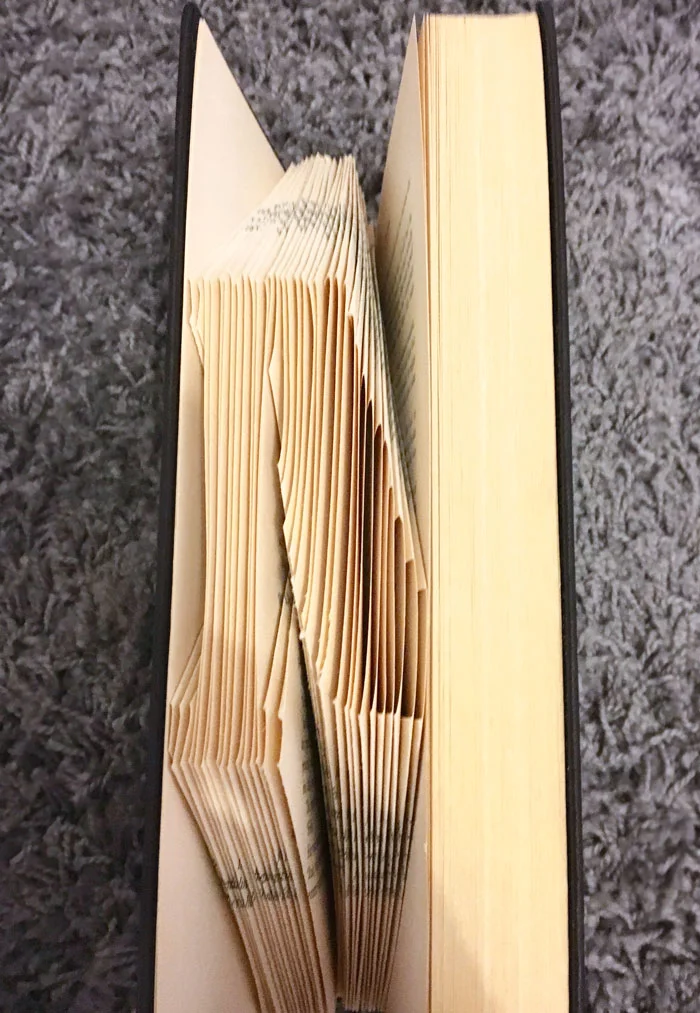
Now you have folded your first letter, you have reached a space. To create the spaces (the parts of the template where there is no black text) fold the pages as shown in the image above. To create this fold you just fold the top corner down as far as you can, and do the same with the bottom corner of the page. This will mean that there is no part of the page that will show when the book is closed.
Use this fold for all of the vertical lines on the pattern that have no black text.

Step 5:
Continue along the pattern by following the steps above until your word is complete. Then close the book slightly and stand it upright and it should look like the above photo. Hard back books will stand on their own a lot easier than soft back books.
Books can be folded into any word (although shorter words work better) and these book folds make lovely handmade gifts for friends and family!
Subscribe to my newsletter to receive fun craft ideas and freebies!


